Importing OVF Files Into Virtualbox
In order to quickly create a new WordPress virtual machine, download a new appliance from Turnkey Linux’s WordPress page. For this specific post, download the ‘zip’ file from the ‘OVF’ link.
Once downloaded, unzip the file and hack away! See the screenshots for a quick overview, or dive in and read the article.
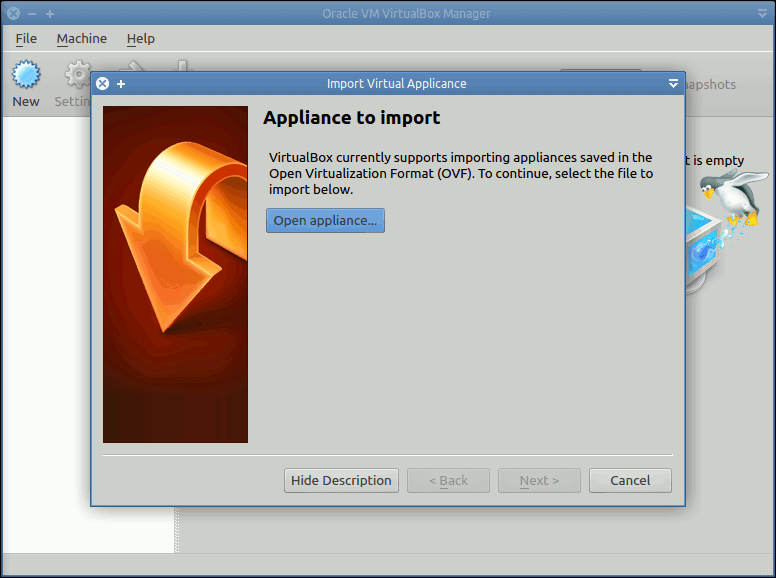

Importing a New Appliance
-
Select File > Import Appliance
-
Click on ‘Open appliance‘ and select the file with the ‘ovf’ extension.
-
Select Next
-
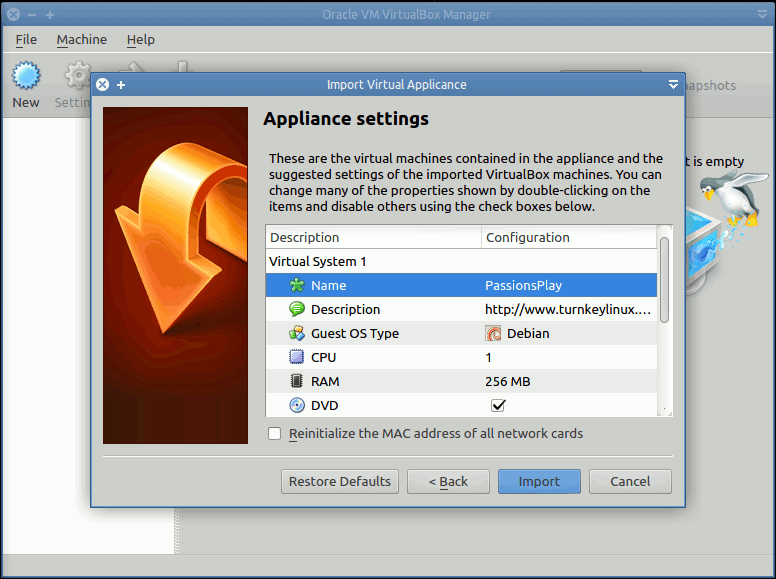
The next screen is an overview of the settings contained in the ‘ovf’ file. In general the default settings should be good. The only thing I typically change is the first item ‘Name‘, changing it to something a little more meaningful.
Scroll down to the ‘Virtual Disk Image‘. This is the physical location of the ‘hard drive’ of this appliance and can be located anywhere on your actual hard drive. Simply make sure that the file that is pointed to ends with the ‘vmdk’ file extension.
This new ‘vmdk’ file will be created as a clone of the original, which is found in the same ‘zip’ archive as our ‘ovf’ file.
-
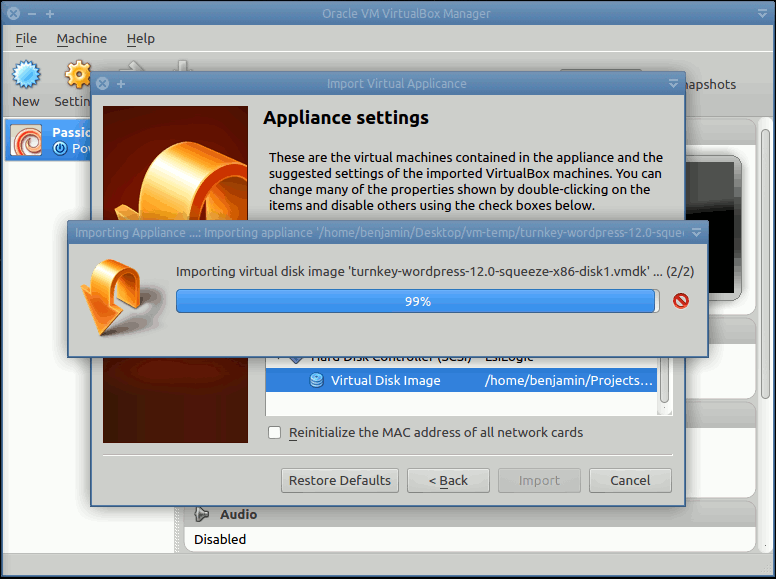
Click import, and watch as Virtualbox clones the disk and imports the settings!
Configuration and Settings
When we start this appliance, we can think of it as physically turning on another computer. This computer will power on, execute various startup scripts, and most importantly for our purposes, connect to a network.
We can specifically configure this connection, allowing the appliance to be available only to our machine, or appear as a completely separate machine on the local network.
To edit an appliance’s network settings, click Machine > Settings and select the Network item from the list on the left.
Bridged Adapter
The bridged adapter is the default adapter for the WordPress appliance from Turnkey Linux. Using this setting, the WordPress appliance will appear as a separate machine from our own computer on the local area network.
So for situations where the local network is trusted, for example, your home, or work network, this is great! It allows other people to connect to this appliance and use it to test functionality or update content — whatever. To the network, this appliance is just another machine, a server, serving up WordPress content.
Host-only Adapter
So what to do if you don’t trust the local network? Sure, the coffee shop’s network seems safe, but all the same, let’s keep our WordPress development for our eyes only.
For this, Virtualbox uses the ‘Host-only Adapter‘ to create – in essence – a network which exists as software only. The appliance is not connected to any physical hardware, so it cannot talk to the outside world, but neither can the outside world talk to it. Security!!
Setting up our pretend network is easy. From Virtualbox’s main menu, select File > Preferences, and select the Network item from the list on the left. Click the Add host-only network icon on the right.
When we return to the machine’s settings and select ‘Host-only Adapter’, the name should default to the network we just created, which is ‘vboxnet0‘ in the screenshot above.
Setup Complete
There are of course other settings for Virtualbox’s network. Many of these are not necessarily useful to us for WordPress development, however, for more information on the various network settings available, see the Virtualbox manual: Chapter 6: Virtual networking.
From here, our WordPress appliance is setup, but we still need to setup the actual WordPress installation on this appliance. To begin, select the appliance, press Start to turn it on, and follow the prompts to create the default passwords for our WordPress appliance.